DIY CHANEL INSPIRED LAMP

DIY CHANEL INSPIRED LAMP

8

Hello lovelies! I never was a craft-friendly person. I am terrible at drawing and at anything that involves glue, scissors and paint. Therefore, I am not very good at DIY projects, not matter how I excited I am and willing to give them a try. With that in mind, once I found a picture of this Chanel inspired lamp on Pinterest, I instantly fell in love. It is a cute little lamp that can totally transform a plain room and add some character to it. As a fashion blogger, I love anything that is brand related; from mugs and candles to pencils and paintings. This lamp although it looks easy and simple enough to make, it was a bit of a challenge to someone who hasn’t been into DIY projects much. I only just recently started to warm up to the idea of creating bits and bobs on my own for my house.

1

This lamp is quite easy to make and not demanding at all. You will need a canvas (I chose a rectangular one because I feel it is better for the design and also with some width), some black paint, a brush, a pair of scissors, some LED fairy lights (mine are a 12 pack from IKEA and they are battery-powered), a ruler and a pair of compasses.

STEP 1

3

For this step you basically design your entwined Cs. Use your ruler to measure the distance of your two Cs from the sides of the canvas. You have to be very specific and careful with your measurements because the Cs must be mirroring each other. After you measure the space and decide where you would be happy with your Cs, use your pair of compasses to design them. It is much easier than what it seems, trust me!

STEP 2

4

Once you have designed your Cs then you need to paint them. I used an acrylic black paint and I mixed it with some water. I didn’t mix it too much because I like the paint to be a bit on the thicker side. Gently and using a small brush paint the two Cs. It doesn’t matter much how you are going to paint them, but it will look better and less messy if the strokes have the same direction. Once you finishing painting the Chanel logo, let the canvas dry. It will dry pretty fast but I let mine for a couple of hours, just to make sure and to avoid making smudges.

STEP 3

5

6

7

This step is going to be a little harder. Once your painting is completely dry, get your ruler and measure the spots where you are going to put your lights. So if you have 12 fairy lights, you need to space them out equally on the 2 Cs.  With your ruler you will measure equal spaces between every two lights. Once you mark the spots, get your scissors and start creating holes on each spot. You need the scissors as the canvas has fibers that you will have to cut. Carefully start creating the holes. I found that using the pointy tip of my pair of compasses and create many tiny holes at first, makes easier for my scissors to cut through the canvas. In order to avoid making your holes too big, try to insert the fairy light and if it barely fits, then your hole is ready. Once you finish all the holes, just push the lights through them and you are done! Last thing is to put batteries and tuck in the cables at the back of the painting so they are not in the way.

I know it is not a major DIY project but I love its simplicity. It is perfect for the bedroom and living room and it adds a touch of “couture” to every space. You can use other logos if Chanel is not your favorite brand but they have to be logos with plain letters and not full words, because in that case you would need a big canvas and more lights. Plus, it would look so cluttered in my opinion. Also you can use whatever colors you like although, no other color expresses Chanel better than black. What do you guys think of the lamp? If you guys create the lamp or something inspired, upload it on Instagram with the hashtag #mycooldiy. I would love to see what you guys have made! Also don’t forget to pop over my Instagram (@blueberrylover) and Twitter (@vickyinlalaland) to say hi!


Till next time take care dolls 😉 xxx

Vicky

JO MALONE OR DIPTYQYE?

 JO MALONE OR DIPTYQUE?

ugh 882

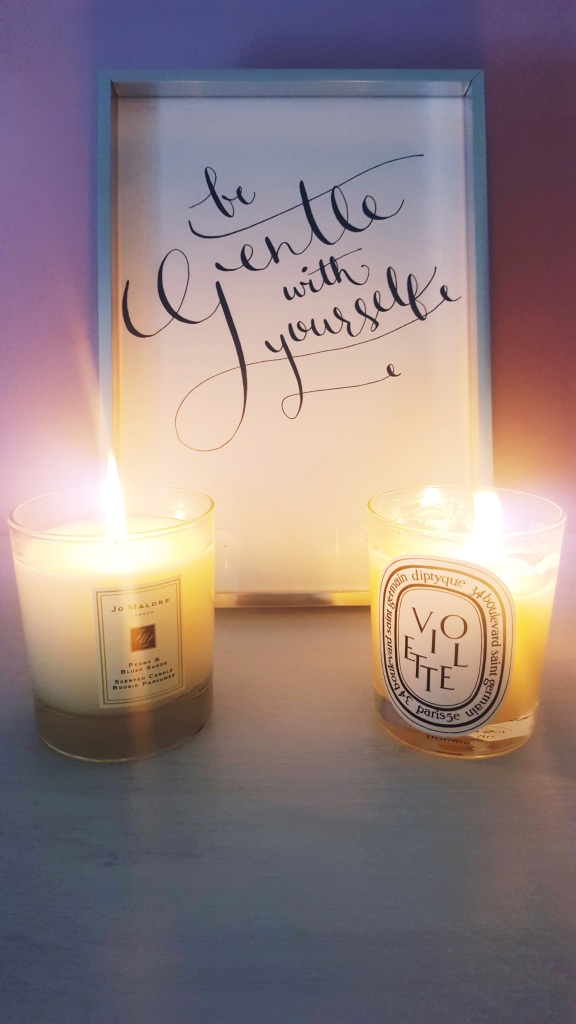
I always loved candles! There is something relaxing and soothing in the air when there is a lovely candle burning in the room. The scent is all over the space and it makes the tension disappear at once. Because of this love I have for candles, in the last couple of years, I have evolved into a great candle hoarder. I have about two dozen candles of all shapes and sizes and possibly a dozen candle holders to go with.  Yankee Candle have been my favorite brand for years and almost all my candles are Yankee ones, however, recently I felt the need to get myself a more high-end candle. There are two brands that are increasingly popular for their candles; Jo Malone and Diptyque. It seems that everyone talks about them lately and you can basically find them in every youtuber’s and blogger’s house. The choice was so hard, since both brands have a variety of amazing scents, so I decided to pick one of each.

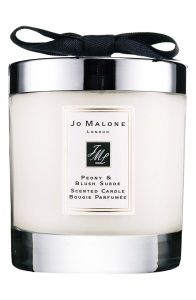
Photo credit: Nordstrom

When I smelled Jo Malone’s Peony and Blush Suede, it was love at first sniff! That candle is gorgeous! It has such a subtle, flowery scent that is very relaxing and calming. It has a lovely packaging with a cute black bow on the top and it comes with a pack of long, black matches to light it up. I also really like the box, as it looks luxurious and it can be used as storage space or simply for decoration. It was at 53 Euros (58.40 $) for 200g and it is supposed to burn for 45 hours.

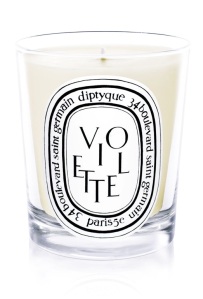
Photo credit: Diptyque Paris

Although I liked a few different scents from Jo Malone, it was a little harder to pick a few good ones at Diptyque; not because the candles didn’t smell nice but because most of the scents were not my cup of tea. One that really caught my nose’s attention, was Violette. That must be the loveliest scent I have ever smelled. It is quite strong but not overwhelming; even when the candle was still in the box, my whole room smelled like it. It is a powdery flowery scent that lingers in the room and for some reason makes me smile by bringing up happy memories in my head. I can’t really explain it; basically, it is a candle that makes me smile! It doesn’t have a lid unlike Jo Malone’s, but in the box it comes with a little booklet that shows the entire process of making the candle, which I find really interesting. It gives the impression of a brand that is indeed specialized in the art of making candles. Another bonus was that the lady at the counter threw in a couple of perfume samples so I also got a taste of Diptyque’s perfumes; overall, I am highly impressed! It was at 44 Euros (48.5 $) for 190g and it is supposed to burn for 60 hours.

I love both of the candles as each one is different and unique in its own way. However, I can’t deny that Diptyque has impressed me beyond words. The scent is wonderful, stronger but not unpleasant, lasts way longer and is cheaper. Jo Malone is an incredible candle as well but it does last less and is more expensive. Overall, I recommend both candles, as they are both luxurious and far better quality than many other candles hence the quite high price tag. If you are about to buy your first high-end candle, I would advise you to begin with Diptyque and then expand to Jo Malone. Both brands have some amazing scents! Comment down below and let me know which brand do you prefer and why, as well as which one is your favorite scent. I know I need to get my hands on Jo Malone’s French Lime Blossom!

Till next time take care dolls 😉 xxx

Vicky

DIY CUTE PRINTS-HOME DÉCOR

DIY CUTE PRINTS-HOME DÉCOR

A few of my favorite things :)
A few of my favorite things 🙂

I don’t know where I have been living these past years, but it must have been under a rock, as I just recently discovered the magic called Pinterest! Or should I say I “re-discovered” it. Although I have a Pinterest profile for years, I never really understood it, until recently. One day I decided to look for some home inspiration and that was it: I got hooked. One thing that caught my eye in many amazing home décor pictures, it was the beautiful paintings and prints which were hanging in bedrooms, offices and living rooms. Prints of makeup, clothes, cute pastel items as well as inspirational quotes.  I did some research and found out many of these prints on Etsy for sale. However, there was one problem: I wanted them all! But I couldn’t or didn’t’ want to buy all of them, which really made my sad. So an idea came to me: why not make my own lovely printed wall art!

You may think that it is a complicated idea but trust me – it’s not; all you need is a good printer (or at least a descent one), some paper and lots of frames! The first step is to search online and find free printables of your choice. There are so many sites where you can find amazing free prints that are very similar to those sold on Etsy. Once you find and save your prints, there are two ways to create lovely wall art:

1st way

A4 regular paper

Thick carton paper

Glue

Scissors

Frame

way 1-horz

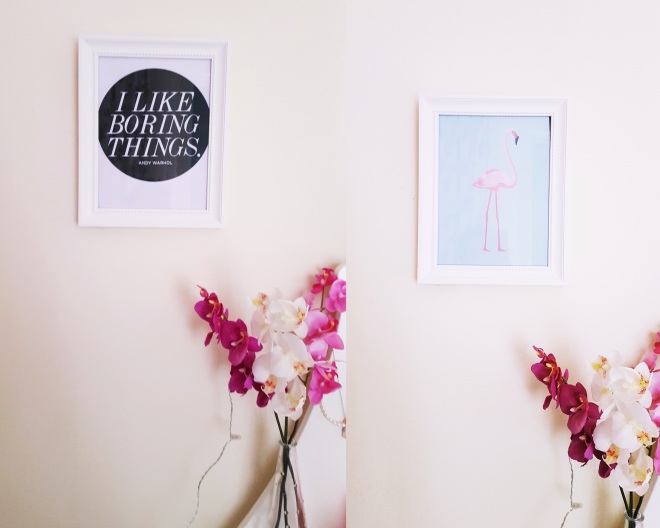
Print the design of your choice on a plain A4 paper (cheap option). Get your paper and measure it based on the size of your frame. Cut what’s exessive. Put the new sized print on the thick carton paper and mark it down. Cut the carton paper in the size of the print and then glue them together. Let it sit for a few minutes with something heavy on top (like a heavy book). Then your print is ready; all you need to do is to place it in your frame and hang it on your wall. Easy peasy and at a very low-cost. Just remember that a light-colored print (like pastel), once printed on a plain A4 paper it will appear much paler, therefore, before printing it out you must enhance the color a little bit and make it about 2 tones darker. All you need is a Photoshop software. I use Photoscape which is a free one and very user-friendly. How cute are those two prints right? (pictured below)

blog 055-horz
Ikea frames

2nd way

Glossy photo paper or inject paper

Frame

second way

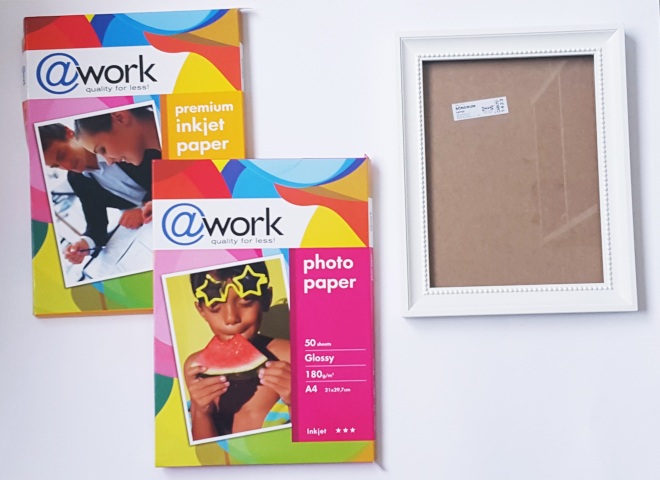
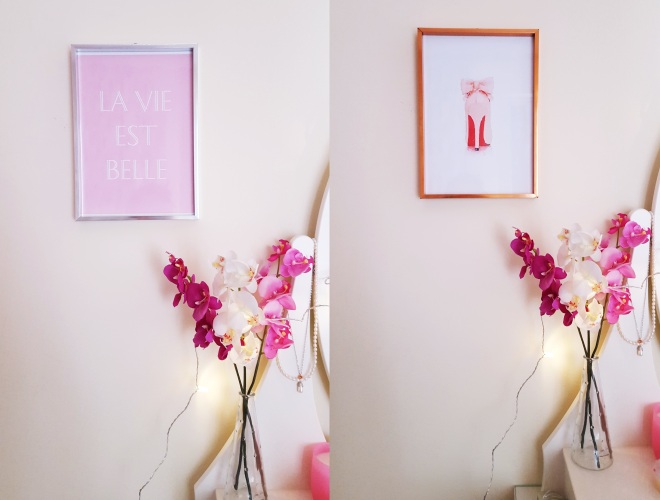
Here, all you need – except the frame – is better quality paper. You can use some inject paper, which is thicker than A4, or some photo glossy paper. You don’t need the premium glossy one, just a little glossy. With that paper you will get the quality and result of the prints sold on Etsy. Just print your design on your glossy paper, after changing the settings to accommodate the new paper. Just change the paper option to photographic paper. Once your print is ready just place it in the frame and hang it on your wall.

second way2
Tiger stores frames

Here there are some links to site with amazing free printables. I am sure you will love them like I do 🙂

I know that this is not the typical crafty handy DIY, but if you love those pretty prints you see on bloggers’ and youtubers’ channels, but you can’t afford or don’t want to buy them, then these free printables are a great way to get your hands on them. They may not be the same but I have found some similar enough. And the best thing is that they don’t really cost much. So get some paper, turn on your printer and let’s do this! I would love to see the prints you hung on your walls and how you decorated your space, so please upload a picture and hashtag #myframedprint!


Till next time take care dolls 😉 xxx

Vicky

MY FAVORITE HOME WORKOUTS

MY FAVORITE HOME WORKOUTS

αρχείο λήψης
Picture on https://www.creatorsclubhouse.com/creativeflow-spot-1/

As autumn has set in for good, I begun to realise that although summer has definitely left the building, the kilos I put on during those three months are still around keeping me company. Following a proper diet and leaving the ice cream days behind, is not enough to get my self back in shape. I also need to exercise quite regularly. However, being a bit lazy, hitting the gym is not really my thing at the moment. Therefore, I decided to exercise at home because in that way I can adjust my workout to my needs and be at my own environment where I feel the most comfortable.

I always thought that exercising at home requires spending lots of money on gym equipment, but I was wrong; exercising at home can be quite cheap yet as effective as going to the gym. There are many different types of workout that are easily performed at home without any equipment or maybe some affordable props

  1. Weight lifting
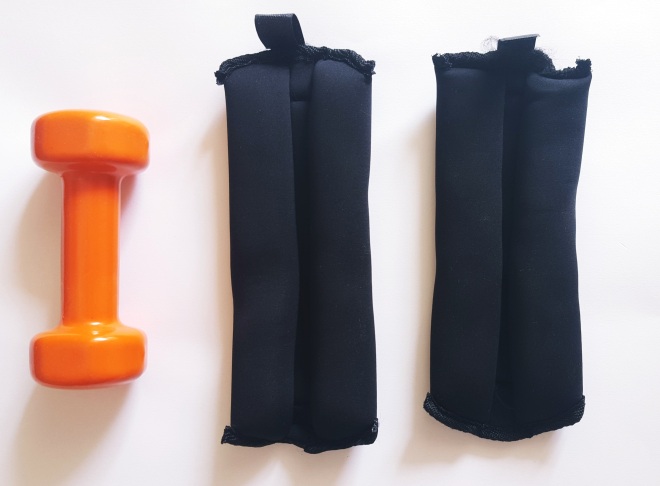
From left to right: Dumbbell and weight cuffs, both from Tiger stores

Lifting weight is a great workout for many areas of our body; not just for the arms. A pair of light dumbbells between 1.5 kg and 3 kgs, is quite cheap – I got mines at Tiger stores – and the simplest way to firm up your arms. But what about the legs? Going through workout videos online, I found out about weight cuffs. They are some sort of dumbbells that you strap on your cuffs or ankles. You can wear them while doing your everyday choirs or while working out. In that way even the simplest exercise or task will be much more difficult to perform. My weight cuffs are also from Tiger stores!

2.  Aerobic

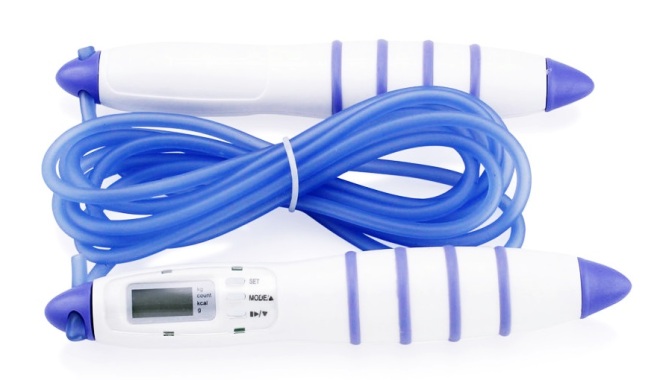
Gym Fitness Digital LCD Jump Rope

Now this is a great way – if not the best one – to burn those nasty calories and seriously firm up. It seems like aerobic has been around since the beginning of time, however it’s not necessary to be on a treadmill to lose a few kilos. Who needs it anyways when you can jog around your neighborhood or simply going for a nice long walk. A plain old jump rope is another cheap yet effective prob. You can get an electronic one like I did and count down the calories in the process. Apart from that, there are tons of videos online with full aerobic programs that will literally knock you off your socks – literally!

3.  Yoga – Pilates

2500062_picture_8073_1
Pilates ball from Tiger stores

This is my new favorite type of workout. Perfect not only for slimming down but also for stretching your body and becoming more flexible. I love pilates as it helps me with my lower back and shoulder problems while yoga also helps me calm down and remove all the negative thoughts from my mind. All you need is a yoga mat which is quite affordable and you can find it practically everywhere – even H&M has one – and a pilates ball. I got both of these props on Tiger store. I know I know, it seems like it’s a Tiger sponsored post but honestly it is a great store with everything in such low prices! If you don’t know where to start, don’t worry; there are so many videos and apps available that it will be hard to choose from!

It’s amazing what you can do at home with just a few cheap gym pieces and some will power! All you need is some videos or apps and you are ready to go! Here I am sharing my favorite workout videos from Youtube as well as a couple of apps I absolutely love:

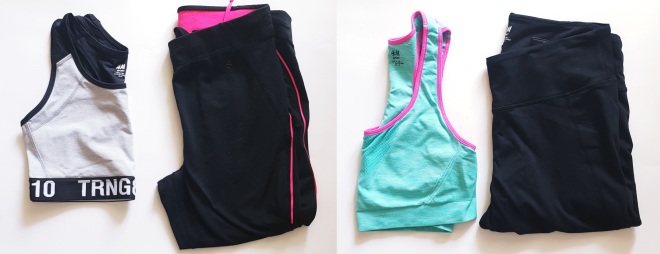
Last but not least, in order to exercise wherever you are, you will need a proper outfit. Something comfortable and suitable for all these different types of workout. I have fallen in love with H&M’s gymwear range as it is the perfect combination of good quality at low price. From bras to leggings, the variety is huge! Many designs and in different prices. My favorite leggings are the plain black ones (only 20 euros) or the black/pink ones (30 euros). These even have a pocket in the back for your valuables (phone, money, keys). Also the bras are amazing! Lovely colors with a great hold and just for 10-15 euros! I can’t praise this range enough!

1-horz
From left to right: H&M Sports bra, H&M Running tights, H&M Seamless sports bra, H&M Sports tights

Exercising at home can be easy and fun! Without spending a lot of money you can achieve the same results by simply getting some props and watching some videos! Now let’s burn those waffles up! Do you guys like to exercise at home? And if so, which one is your favorite workout?

Till next time take care dolls 😉 xxx

Vicky